Default.aspx
<asp:GridView ID="GridView1" runat="server" AutoGenerateColumns="False"
onrowcancelingedit="GridView1_RowCancelingEdit"
onrowediting="GridView1_RowEditing">
<Columns>
<asp:BoundField DataField ="id" HeaderText ="id" ReadOnly="true" />
<asp:TemplateField HeaderText ="name">
<ItemTemplate >
<asp:Label ID="Label1" runat="server" Text='<%#Eval("name") %>'></asp:Label>
</ItemTemplate>
<EditItemTemplate>
<asp:TextBox ID="TextBox1" runat="server" Text='<%#Eval("name") %>'></asp:TextBox>
<asp:RequiredFieldValidator ID="RequiredFieldValidator1" runat="server" ErrorMessage="Please enter the data" ControlToValidate ="TextBox1"></asp:RequiredFieldValidator>
</EditItemTemplate>
</asp:TemplateField>
<asp:TemplateField HeaderText ="fathername">
<ItemTemplate >
<asp:Label ID="Label2" runat="server" Text='<%#Eval("fathername") %>'></asp:Label>
</ItemTemplate>
<EditItemTemplate>
<asp:TextBox ID="TextBox2" runat="server" Text='<%#Eval("fathername") %>'></asp:TextBox>
<asp:RequiredFieldValidator ID="RequiredFieldValidator2" runat="server" ErrorMessage="Please enter the data" ControlToValidate ="TextBox2" ></asp:RequiredFieldValidator>
</EditItemTemplate>
</asp:TemplateField>
<asp:CommandField ShowEditButton="True" />
</Columns>
</asp:GridView>
Default.aspx.cs
protected void Page_Load(object sender, EventArgs e)
{
if (!IsPostBack)
{
BindDataToGrid();
}
}
public DataSet BindDataToGrid()
{
SqlConnection con = new SqlConnection(ConfigurationManager.ConnectionStrings["ConnectionString"].ToString());
SqlCommand cmd = new SqlCommand("select * from employee", con); SqlDataAdapter da = new SqlDataAdapter(cmd);
DataSet ds = new DataSet();
da.Fill(ds);
GridView1.DataSource = ds;
GridView1.DataBind();
return ds;
}
protected void GridView1_RowEditing(object sender, GridViewEditEventArgs e)
{
GridView1.EditIndex = e.NewEditIndex;
BindDataToGrid();
}
protected void GridView1_RowCancelingEdit(object sender, GridViewCancelEditEventArgs e)
{
GridView1.EditIndex = -1;
BindDataToGrid();
}
Thursday, January 28, 2010
Thursday, January 21, 2010
SharePoint Sites and workspaces
Creating Sites and workspaces :
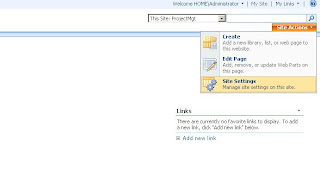
Step1:Click on site Settings under the Site Action Section.
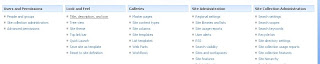
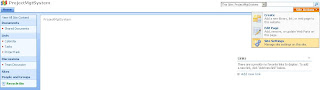 Step2: Click on Sites and workspaces.Under the Site Administration Section.
Step1:Click on site Settings under the Site Action Section.
 Step2: Click on Sites and workspaces.Under the Site Administration Section.


SharePoint Save site as template
Creating Custom List as Template
Step1: open the Custom List.
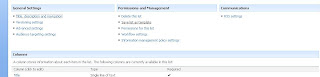
 Step2: Click on List Settings under the settings section.
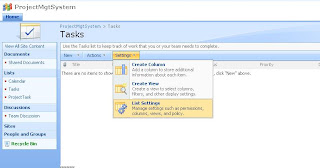
step3:Click on Save list as template under the Save list as template section.
Step4:Enter the new List name.
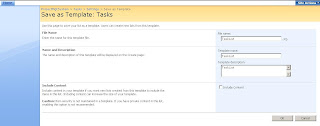
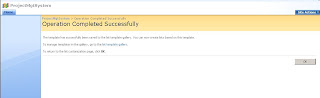
Step5:Now new List is Created.Click on OK Button.
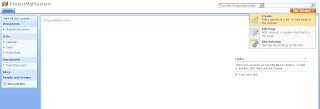
Step6:Click on the Create under the site Action section
Step7: Now New List is Available "TaskList" under Tracking Section.

Step1: open the Custom List.
 Step2: Click on List Settings under the settings section.
step3:Click on Save list as template under the Save list as template section.

Step4:Enter the new List name.

Step5:Now new List is Created.Click on OK Button.

Step6:Click on the Create under the site Action section

Step7: Now New List is Available "TaskList" under Tracking Section.

Wednesday, January 20, 2010
SharePoint Tree view
Setup Enable Quick Launch :
Step1: Click on Site Settings under the Site Action. Right side of the page
 Step2: Click on Tree View under the Look and Feel Section.

Step3: Select Quick Launch Check Box.

Step4:Now Quick Launch is Updated.

Step1: Click on Site Settings under the Site Action. Right side of the page
 Step2: Click on Tree View under the Look and Feel Section.
Step3: Select Quick Launch Check Box.

Step4:Now Quick Launch is Updated.

SharePoint Title, description, and icon
Changing the Sharepoint Site Title and Description:
Step1: Click on Site Settings under the Site Action .right side of the page.
 step2:Click on Title description under the Look and feel section.
Step3: here you can change the Title and Descrition.
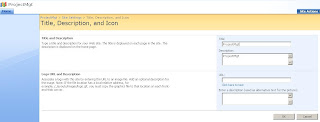
Step4: Here i have given New Title for my Site.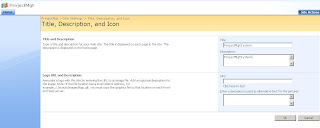
Step5:Now title is Updated

Step1: Click on Site Settings under the Site Action .right side of the page.
 step2:Click on Title description under the Look and feel section.
Step3: here you can change the Title and Descrition.

Step4: Here i have given New Title for my Site.
Step5:Now title is Updated

Saturday, January 16, 2010
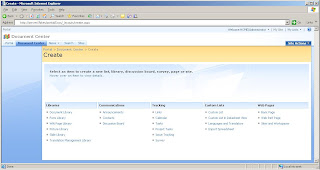
Create sharepoint Custom List and ContentType
step1: click on site settings under the site actions

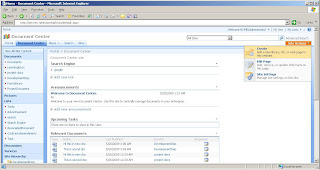 step2:click on custom list under the custom lists

 step2:click on custom list under the custom lists


SqlServer Substring
DECLARE @strString VARCHAR(50)
SET @strString = 'SUBSTRING'
SELECT SUBSTRING(@strString,1,1) AS STRSTRING
Result:S
SELECT SUBSTRING(@strString,1,2) AS STRSTRING
Result:SU
SELECT SUBSTRING(@strString,1,3) AS STRSTRING
Result:SUB
SELECT SUBSTRING(@strString,1,4) AS STRSTRING
Result:SUBS
SELECT SUBSTRING(@strString,1,5) AS STRSTRING
Result:SUBST
SELECT SUBSTRING(@strString,1,6) AS STRSTRING
Result:SUBSTR
SELECT SUBSTRING(@strString,1,7) AS STRSTRING
Result:SUBSTRI
SELECT SUBSTRING(@strString,1,8) AS STRSTRING
Result:SUBSTRIN
SELECT SUBSTRING(@strString,1,9) AS STRSTRING
Result:SUBSTRING
SELECT SUBSTRING(@strString,3,9) AS STRSTRING
Result:BSTRING
SELECT SUBSTRING(@strString,-5,9) AS STRSTRING
Result: SUB
SELECT SUBSTRING(@strString,-7,9) AS STRSTRING
Result:S
Subscribe to:
Posts (Atom)